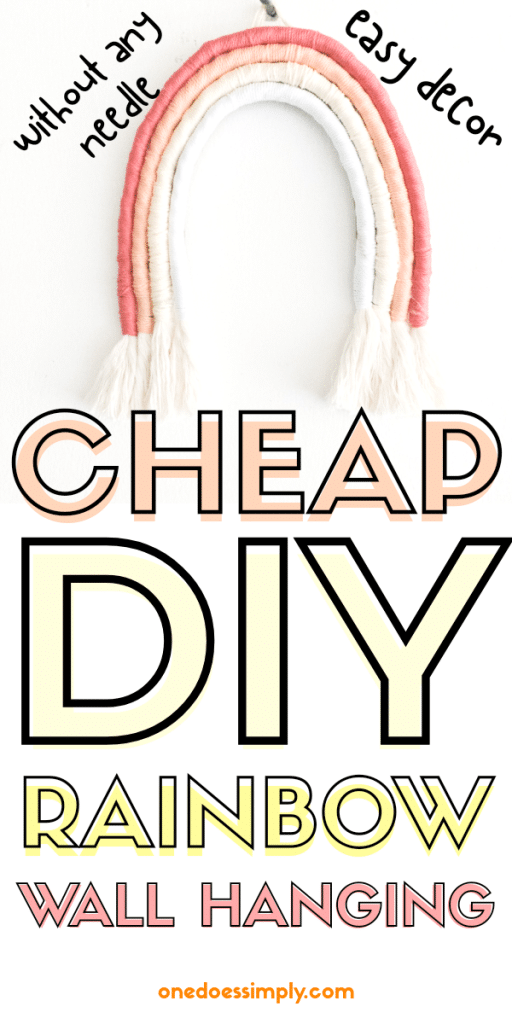


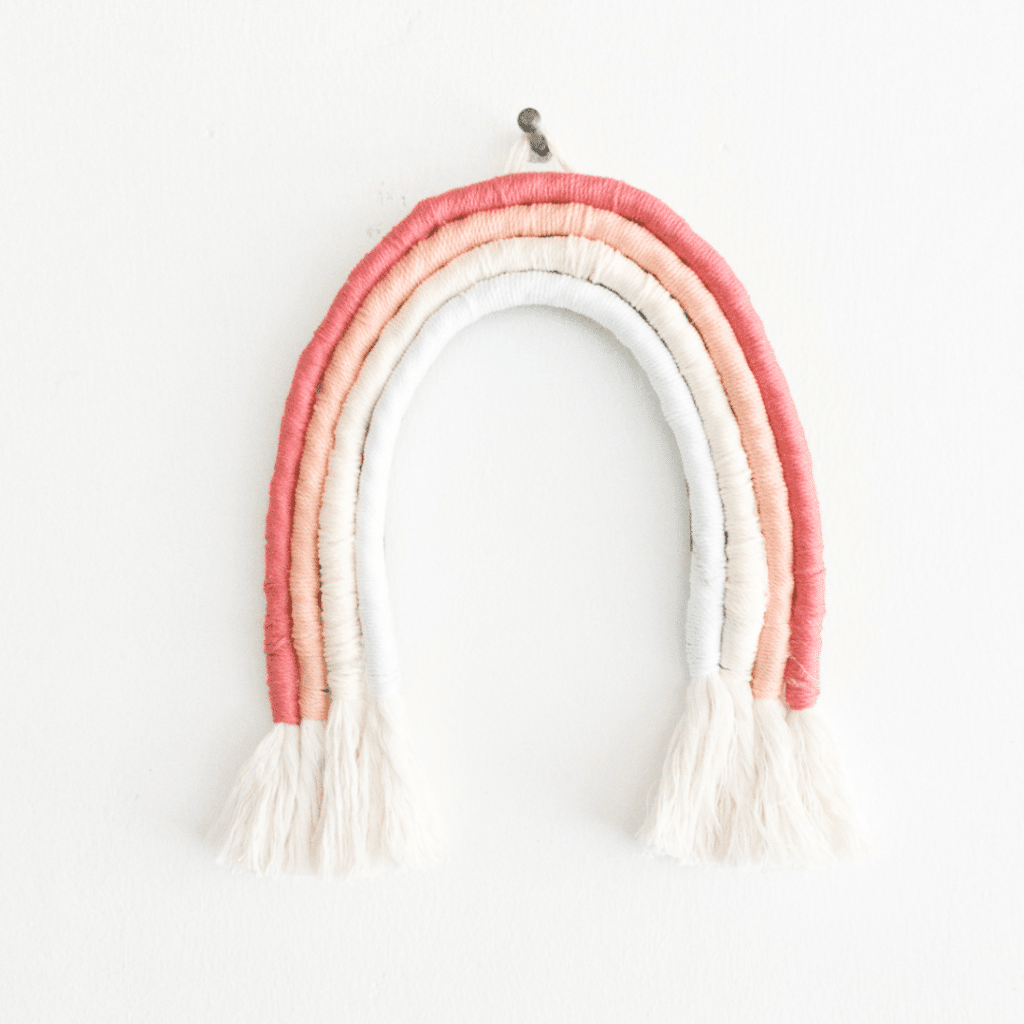
This DIY rainbow wall hanging is so easy and cheap to make!
You can craft this amazing home decor using simple supplies!
So check out this tutorial and try it at home on a budget!
How To Make DIY Rainbow Wall Hanging
If you see the tutorial of making rainbow wall hanging in other places, you might see that they use curved upholstery needles and also a regular needle for the yarn.
But what if you don’t have those kind of needles at home?
What if you only got yarn and other simple supplies at home?
Can you still make a cute wall hanging?
Absolutely yes!
To make this project you can use cheap and simple supplies that are easy to find.
Supplies:
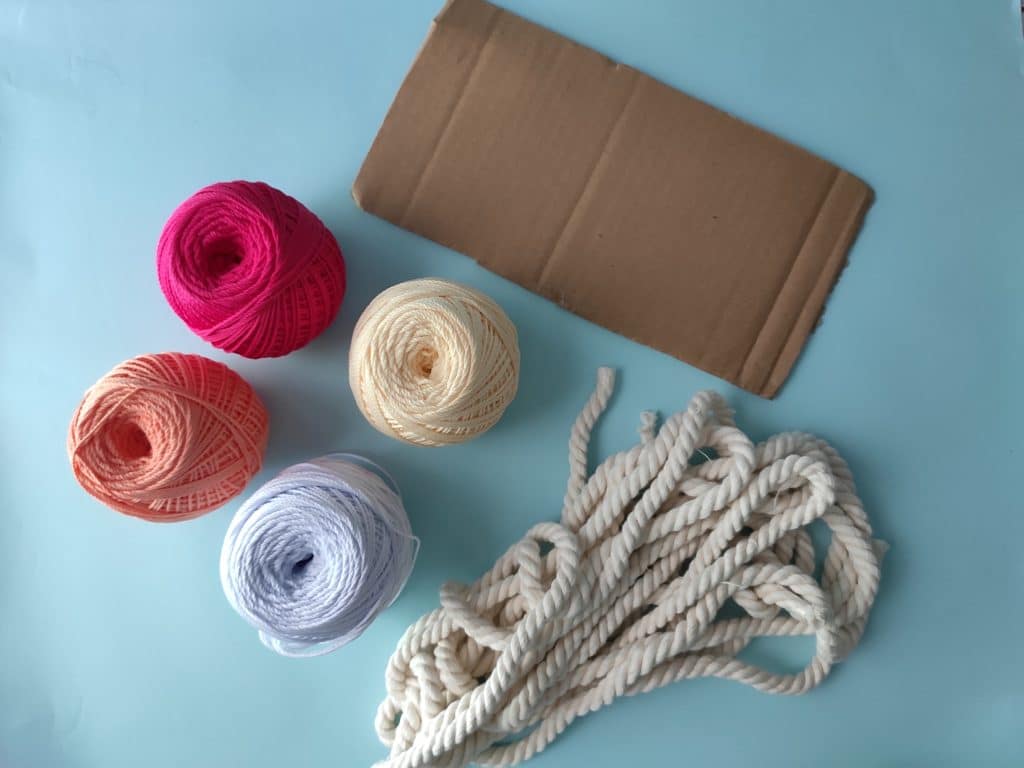
-yarns (in any colors you have, actually)
-cotton rope (I used the one with 8mm thickness, but if you have a thicker/thinner one that’s totally fine!)
-cardboard box (or cereal box or carton or any thick&stuff paper)
Materials:
-scissors
-glue gun
-tape (use what you already have at home)
Instructions:
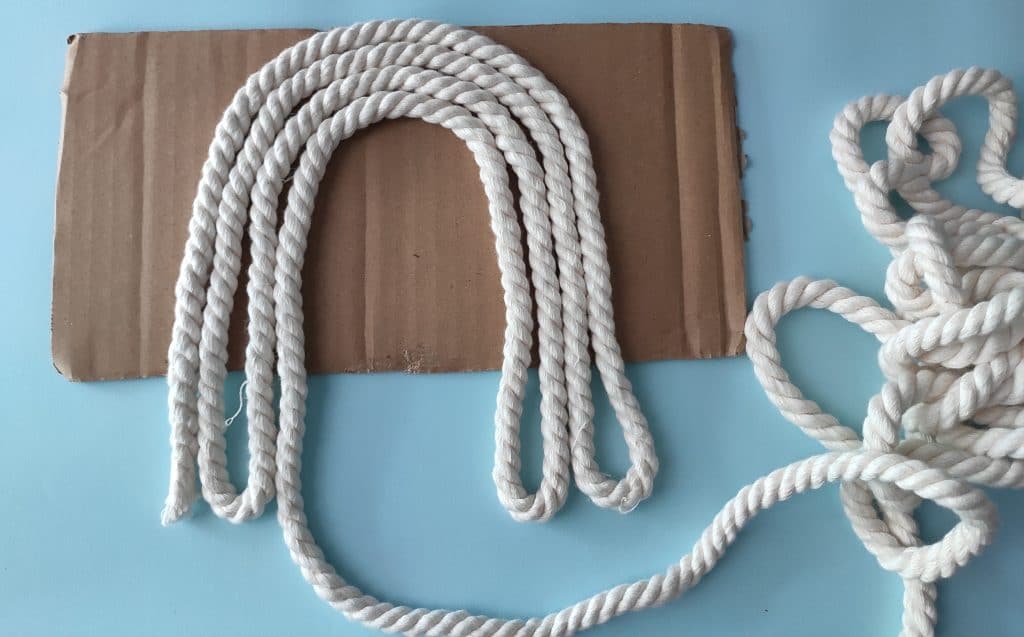
STEP 1
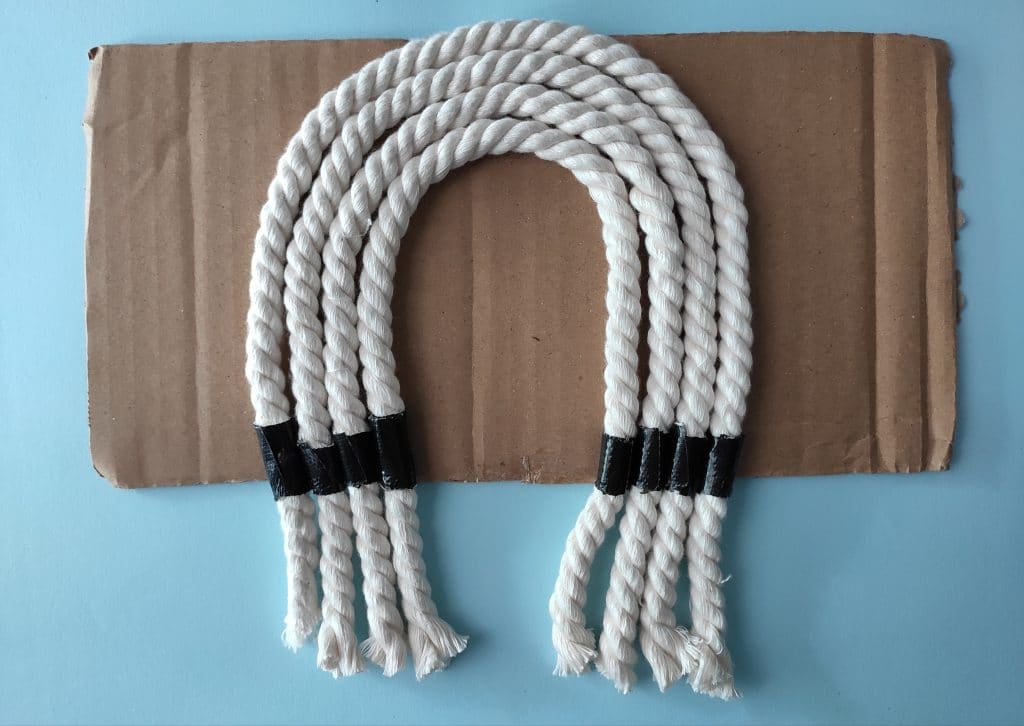
Shape your yarn into tiered curves. Do this on your cardboard box to make sure your “rainbow” is not too big.
We use the cardboard as the “base”.
Bear in mind that after the next processes the curves can be bigger because they are wrapped with yarn.
That’s OK, as long as the cardboard width can “hold” the majority of the rainbow.
When you get the desired length, cut the rope.

STEP 2
Tape the rope.
Cotton rope can easily unravel if you don’t secure the edge.
We are about to make several “edges”.
We DO eventually want the edges to unravel, but only the edges, not the whole rope.
So, we secure the edge using tapes.
You can use any tape you have at home. No need to buy anything fancy.
STEP 3
Cut! Cut! Cut!
See? We are making “edges” here.
Luckily, the edges are secured already with tapes.
STEP 4
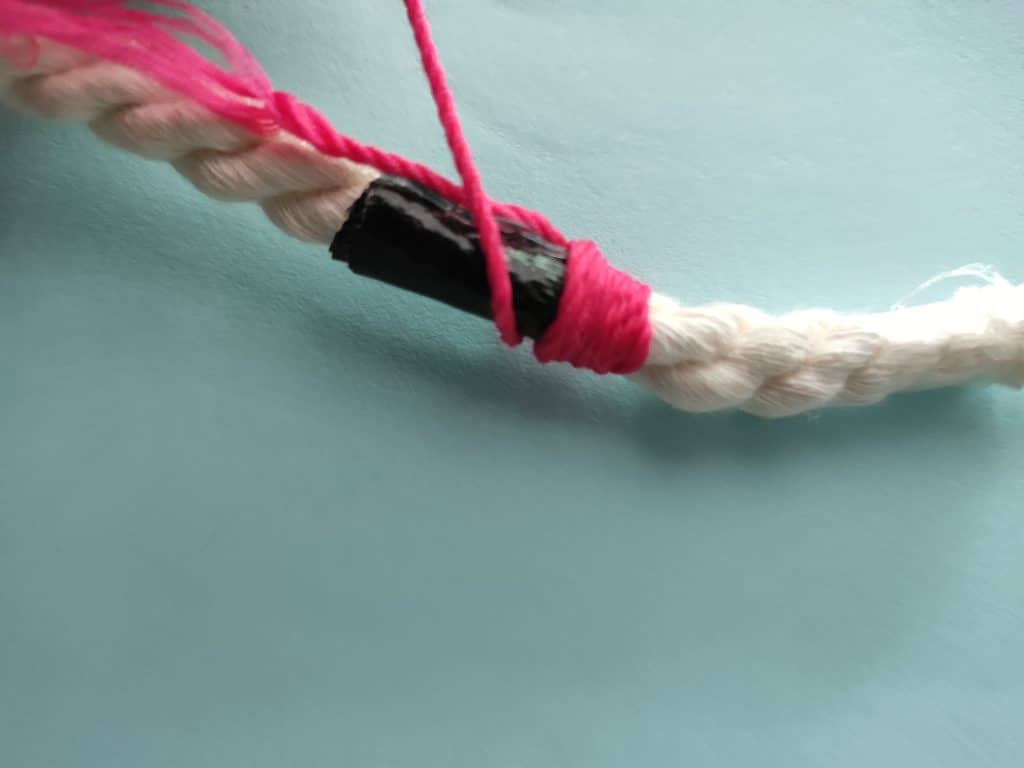
Wrap the yarn around the rope
To make life easier, start the wrapping with a little glue gun to stick the edge of the yarn to the rope.
You want to hide the edge of the yarn and the tape so wrap them as well.
When your yarn have covered the curve (from tape to tape) it’s time to finish the wrapping.
Give an extra length before cutting the yarn for securing the wrapping (1-2 inches is fine).
Glue that final edge of the yarn to the “rainbow”.
The purpose is for preventing your wrapping from unraveling.
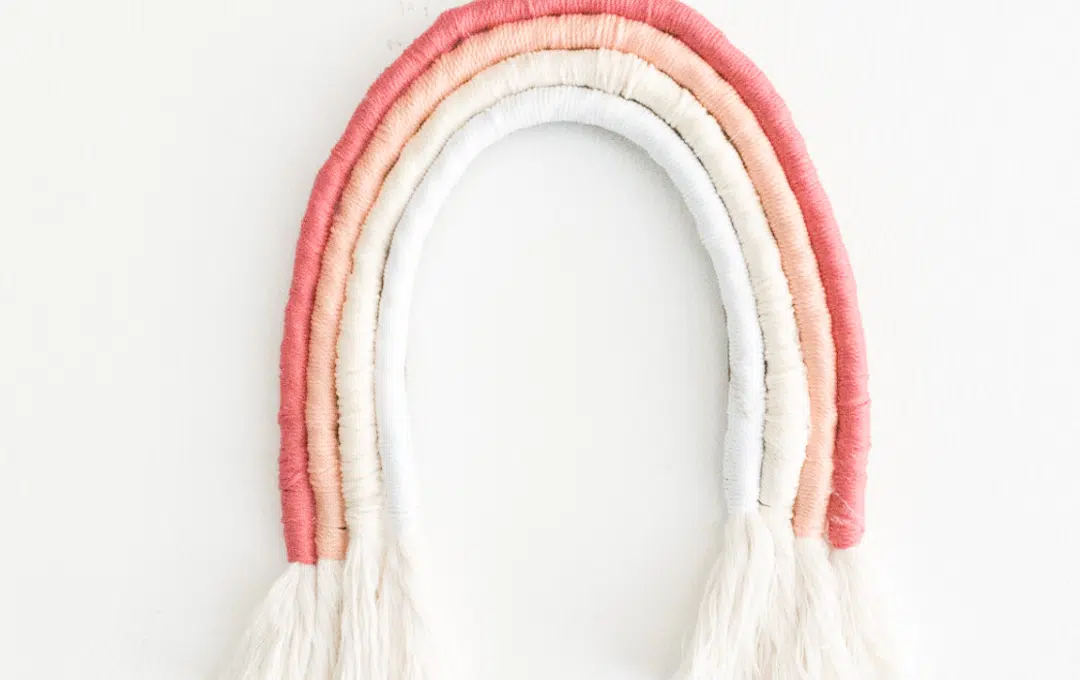
In this point you should have a piece of “rainbow” in your hand.
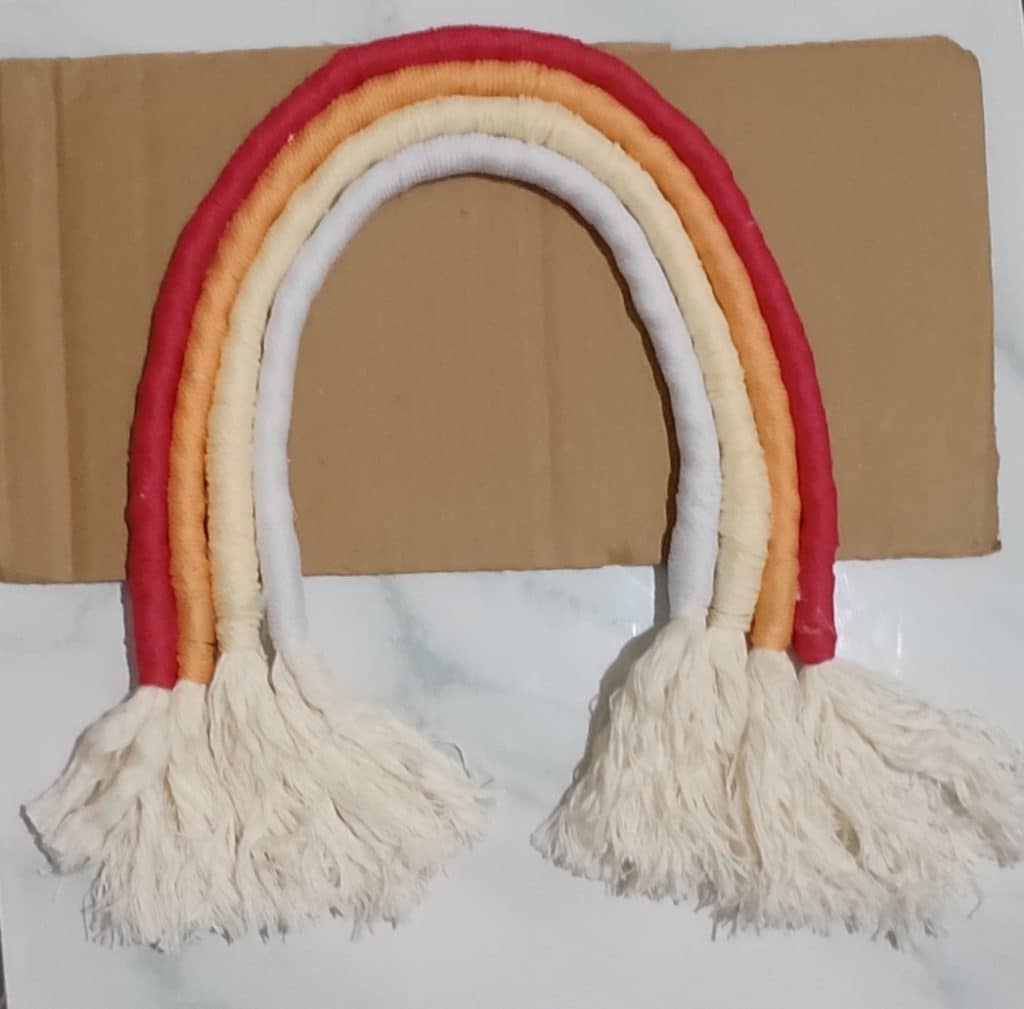
Repeat until all of your ropes are wrapped.

STEP 5
Glue the pieces of rainbow to the base (the cardboard).
Before using the glue, try to organize your rainbow on the cardboard box to make sure once again that your cardboard can “hold” the majority of your rainbow.
Then glue them all, one piece at a time.
You can also glue not only rope to cardboard but also one rope to another to make it super secure.
After that, cut the cardboard so it fits the shape of the rainbow.
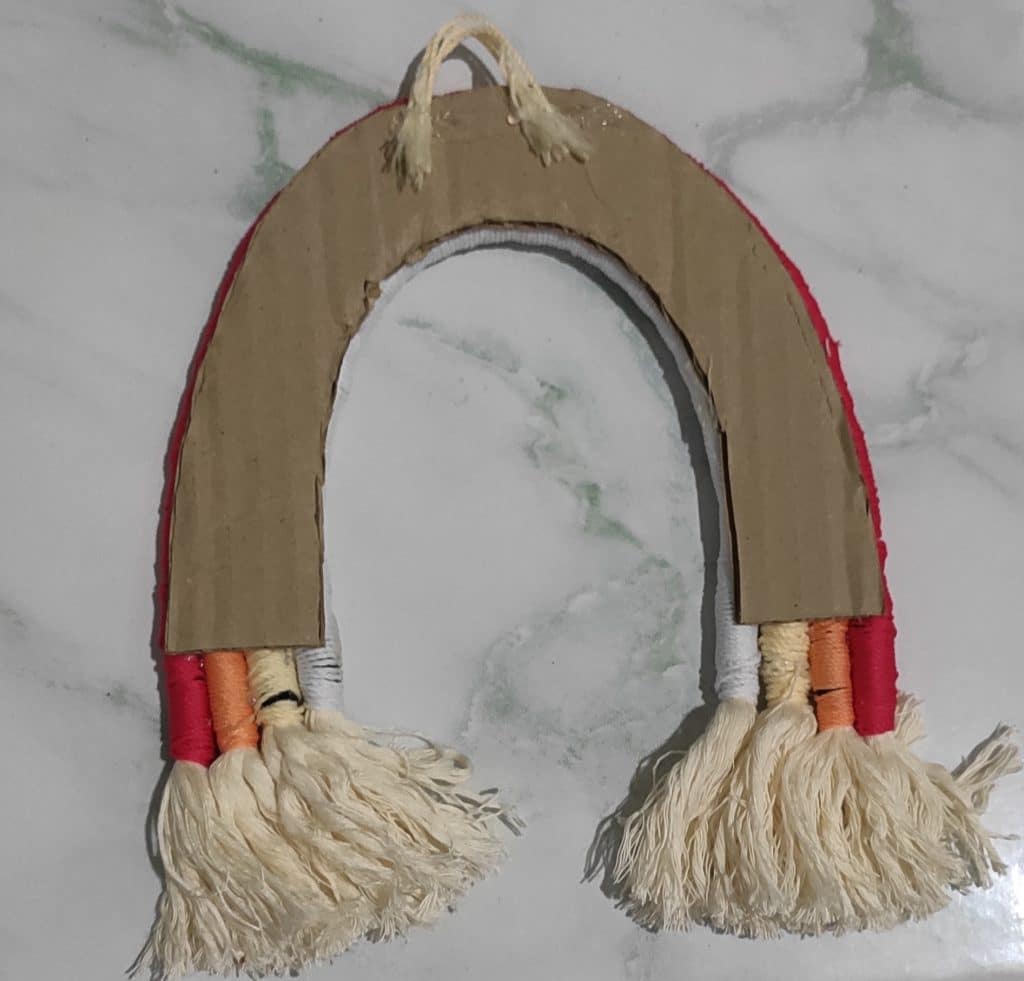
The final steps are : TRIMMING and giving it a “hanger” on top so you can hang it on the wall.
voila!
Really easy and cheap, right?
You can craft this DIY home decor in a budget and you can use it for decorating your kids room!
Happy crafting!
Oh, and don’t forget to pin it!